Quick start
Aitera MDM brings together devices, users, apps and settings in the organization’s workspace. Start with one test device: prepare the owner, choose the connection mode, assign settings and verify the result on the device itself.
Before you begin
You need the address of your organization’s console, an administrator account and device access to the MDM server. Capabilities depend on the platform, the management mode and the configured integrations. Check the supported OS versions for the client and agent you use: the former “Android 5+ / iOS 11+” table is not a confirmed matrix for this version.
1. Open the workspace
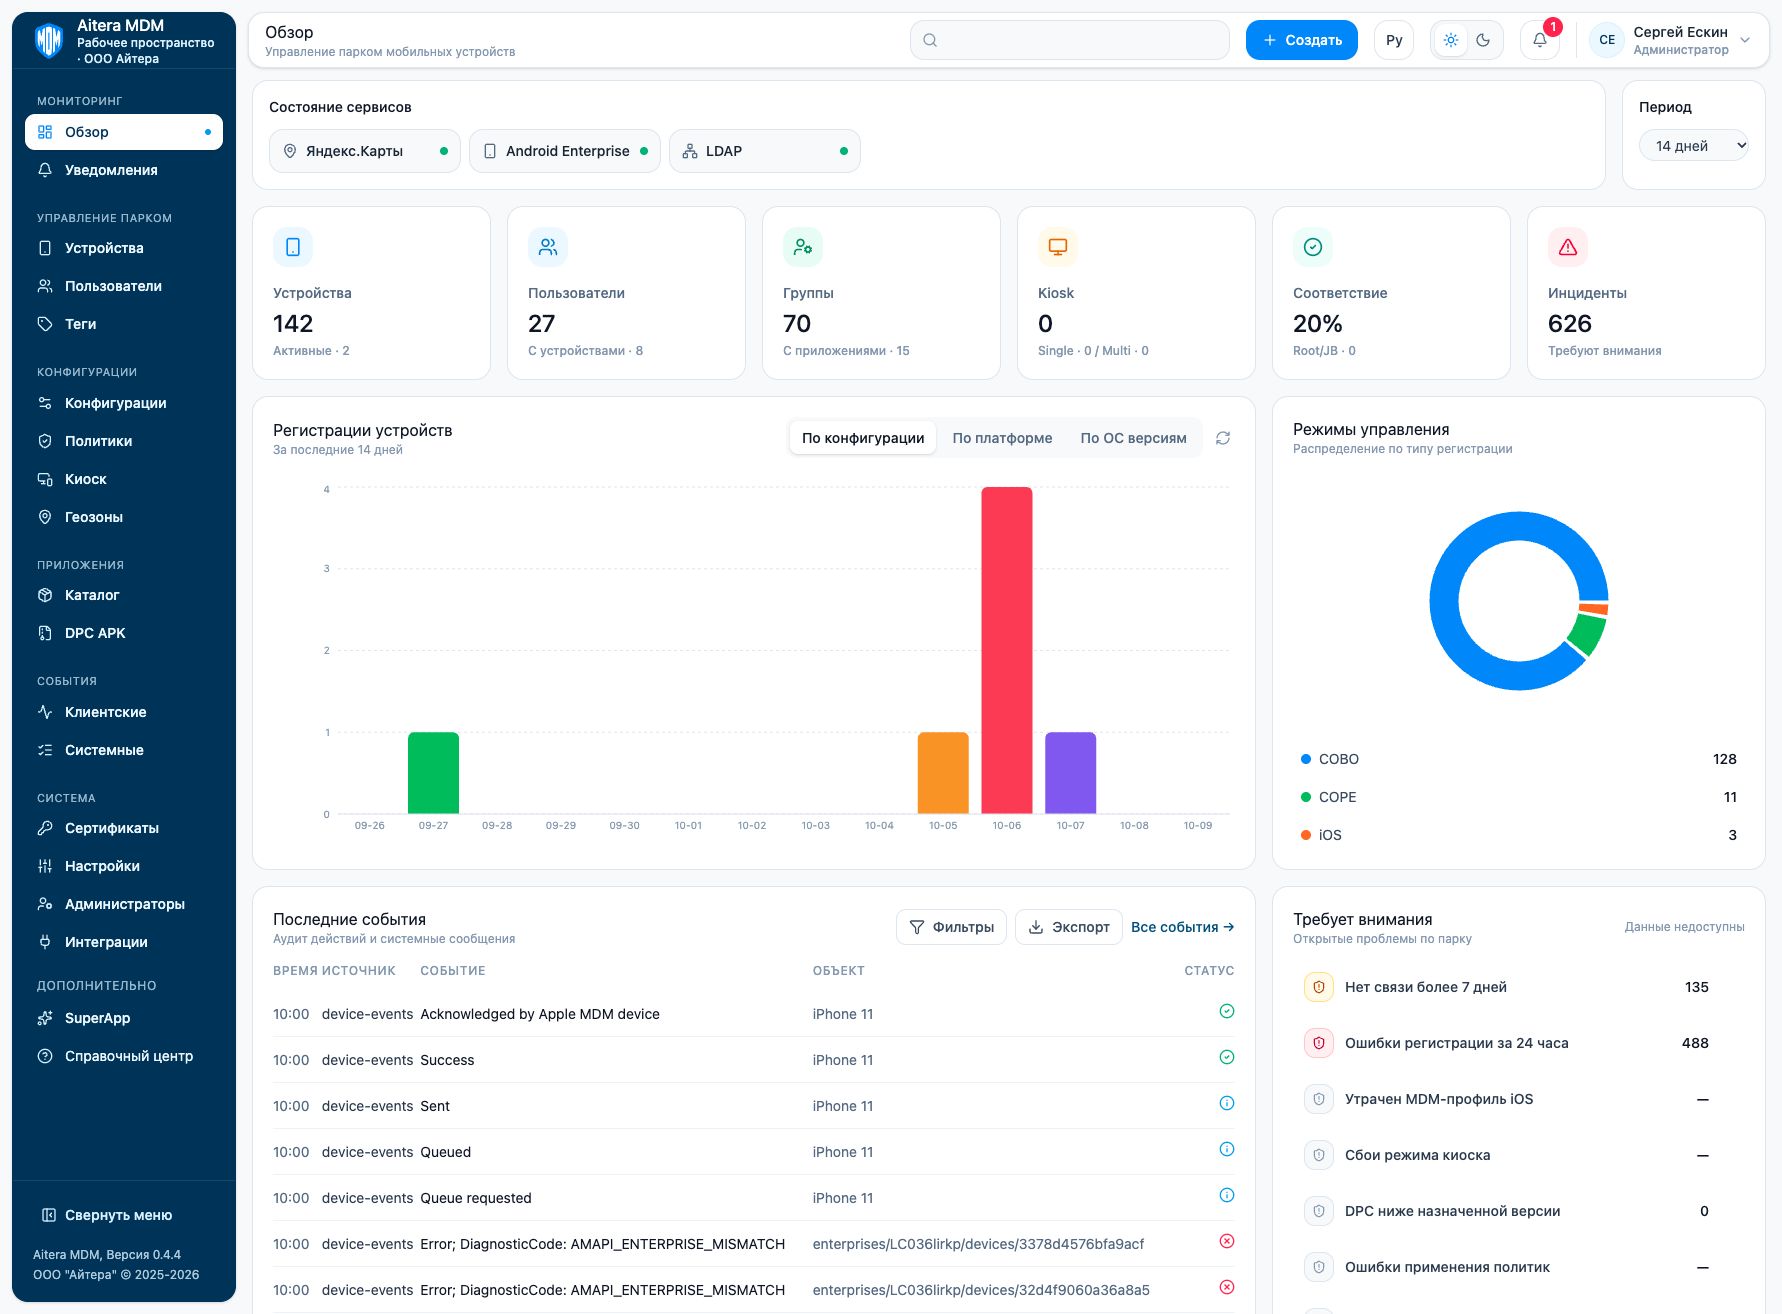
Sign in to the console. In the “Overview” section, check the state of services, the device fleet, the distribution of management modes and events. The value “Configured” means saved integration settings; its availability is checked separately.
2. Prepare users and groups
Open “Users”. Create an account for an employee or use one synchronized from LDAP. On the “Groups” tab, combine the users who need the same assignments.
In COBO mode, a device can be connected without a user: it will belong to the organization. There is no need to create a dummy employee for such a connection.
Users · Groups and assignments
3. Choose a connection method
In the “Devices” section, click “Add device”. The wizard starts with the choice of management type, then offers the owner and connection parameters.
| Mode | What it is used for |
|---|---|
| COBO | Fully managed corporate Android device |
| COPE | Corporate Android device with a work profile |
| BYOD | Mobile app connection on a personal Android device |
| iOS | Mobile app connection on iPhone/iPad |
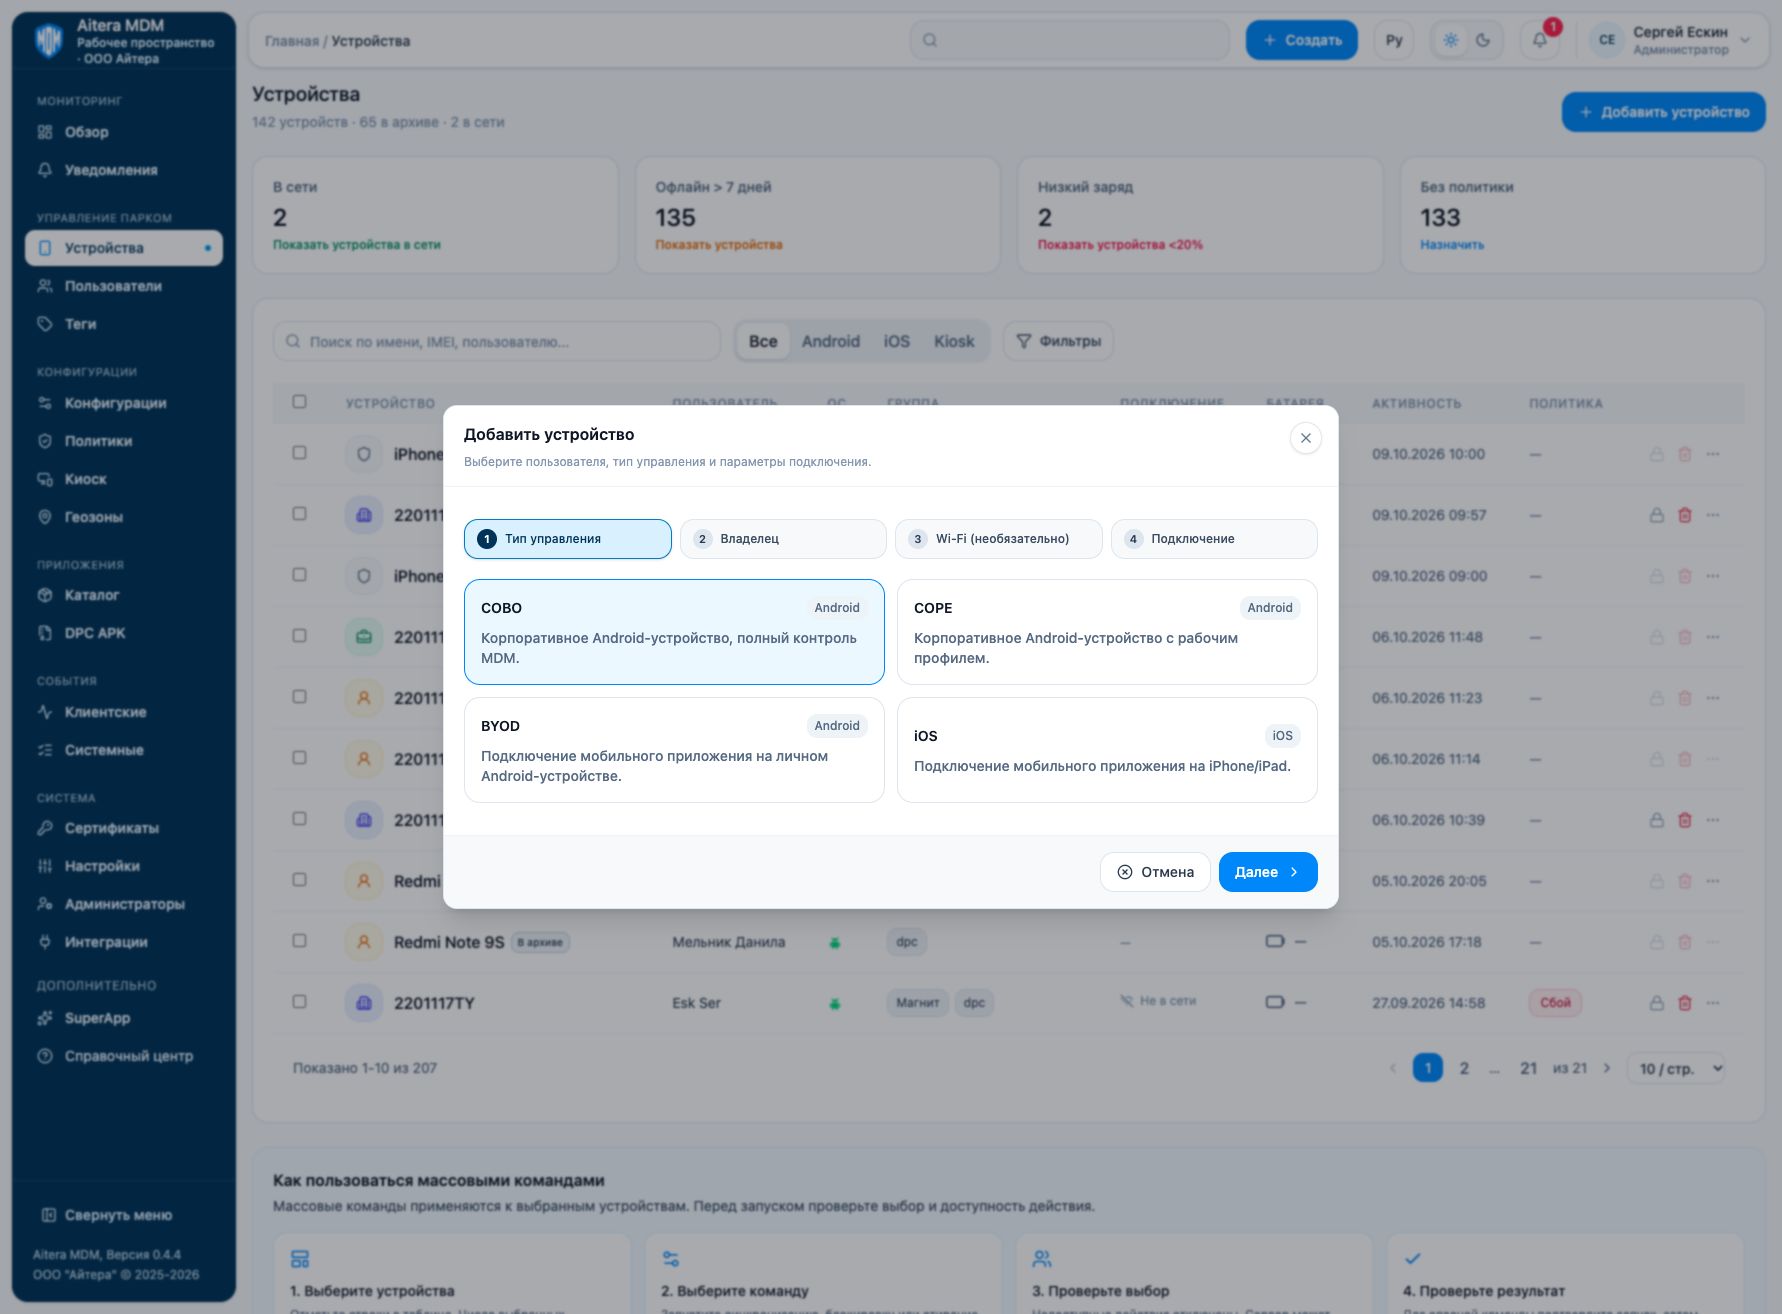
Choosing BYOD or iOS in this wizard does not by itself confirm the creation of an Android work profile or the installation of an Apple MDM profile.
For COBO, the “Without user binding” option is available. Set the QR code lifetime; the available values are 5, 15, 30 and 60 minutes. QR expiration does not disconnect a device that is already registered. At the Wi-Fi step, you can select a configuration or continue without one.
Detailed connection instructions
4. Assign settings
Different tasks are solved by different objects:
| Object | Purpose |
|---|---|
| Configuration | Device and app parameters |
| Policy | Security requirements and the response to violations |
| Kiosk | Available apps and interface restrictions |
| Group | Recipients of assignments |
| Tag | Labeling devices for search and selection |
| Geofence rule | Condition for applying a configuration by location |
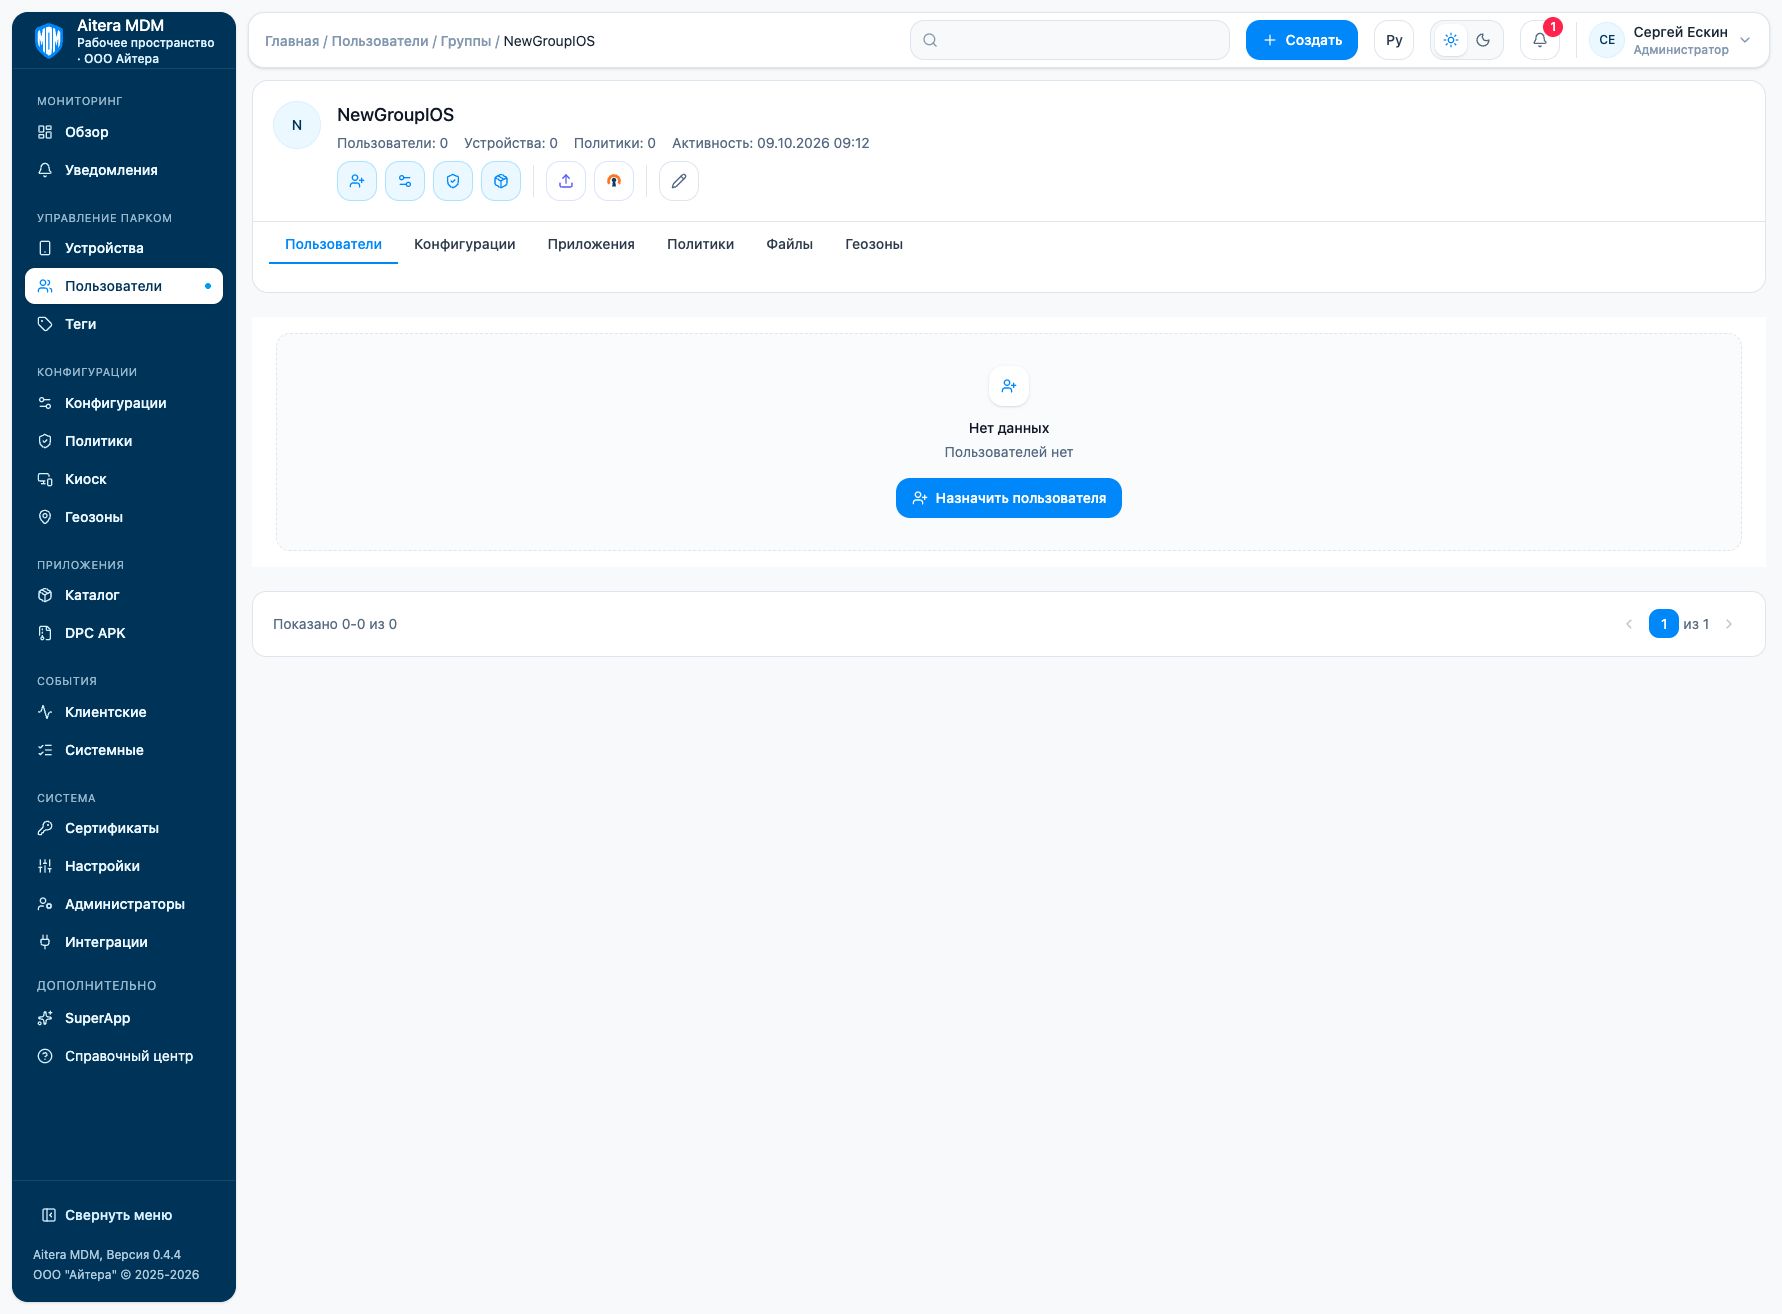
The group card uses the tabs “Users”, “Configurations”, “Applications”, “Policies”, “Files”, “Geofences”. Start with a small test group.
5. Verify the result
Open the device and check connectivity, the last update, assignments and events. Saving an object, assigning it, sending a command and executing it on the phone are different stages. A successful send does not yet prove that the setting has been applied.
In “Events → Client”, check the connection with the device and command execution; in “Events → System”, check administrator actions and object changes.
Configurations · Policies · Logs
Where to go next
Application catalog · DPC APK · Kiosk · Geofences · Notifications · Integrations